APEX 19.2 Early Adopter: Web Credentials for OCI
The early adopter version of APEX 19.2, has the capability to create web credentials to connect to the Oracle Cloud Infrastructure (OCI). This will allow you to connect to the REST API’s in order to manage your cloud resources.
Note: Since this is the early adopter version of APEX 19.2, some of this is likely to change in the production release. So take all of this with a grain of salt.
The authentication process to these API’s is a bit convoluted and has previously only been available to a few SDK’s, making it difficult to connect APEX to OCI.
The new feature allows you to simply copy & paste your credentials and then build Web Source Modules on the various endpoints. So you can, for example, create a web source module on the storage bucket API endpoint, and build an APEX report to display the buckets.
Before you get started, you need to have access to an OCI tenancy and know the following about your account:
- User OCID – The OCI ID of the user account you connect with. (See user settings in console)
- Private key – The *.pem file used to authenticate the user. (See documentation)
- Fingerprint – The fingerprint associated with the PEM file. (See user settings in console)
- Tenancy OCID – The OCI ID of your tenancy. (See tenancy settings in console)
If you already have OCI command line client installed, you can simply get the info from the ~/.oci/config file.
You will also need to know the OCID of the compartment you want to connect to, as well as the tenancy name.
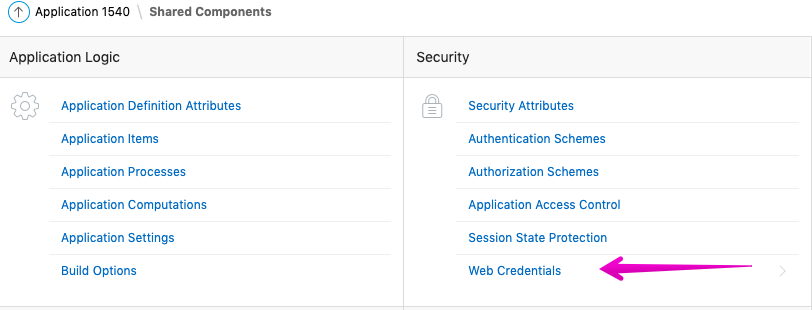
Now that you have all these items, you can begin to create the web credential. Navigate to Shared Components -> Web Credentials:
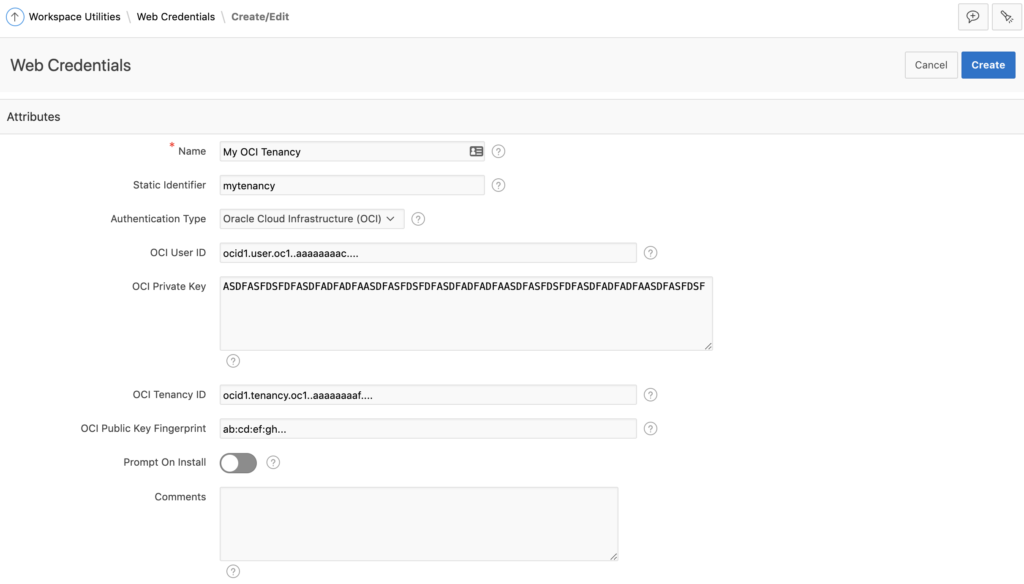
From there click the Create button to create a new credential.
Simply fill out the fields with your credentials and make sure to set the Authentication Type to Oracle Cloud Infrastructure (OCI). The OCI Private Key field contains the contents of your private *.pem file. Make sure to paste it as a single line without any spaces or line breaks. Also remove the —–BEGIN PRIVATE KEY—– and —–END PRIVATE KEY—– lines. In other words, only paste the actual alphanumeric key as a single line.
Currently, there is no way to validate the credential, other than creating a web source module on it and testing it.
Click the Create button.
Now let’s move on to create a web source module to list object storage buckets. Navigate to Shared Components -> Web Source Modules and click the Create button. Select From scratch and click Next.
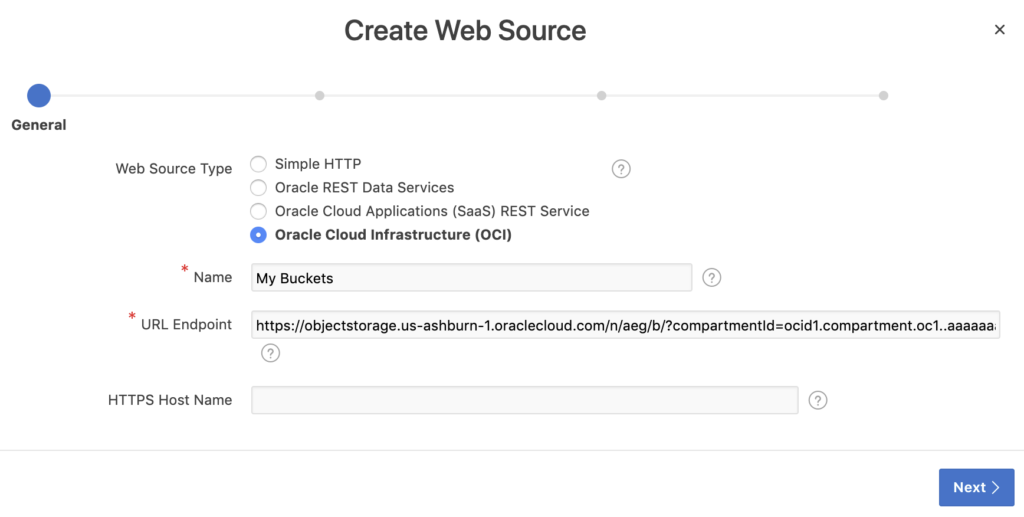
Select the radio button for Oracle Cloud Infrastructure (OCI), fill in the Name and the URL Endpoint. You can find the URL endpoints from the documentation. In this example I use the endpoint to list the object storage buckets. You can simply paste the entire URL and leave the HTTPS Host Name empty:
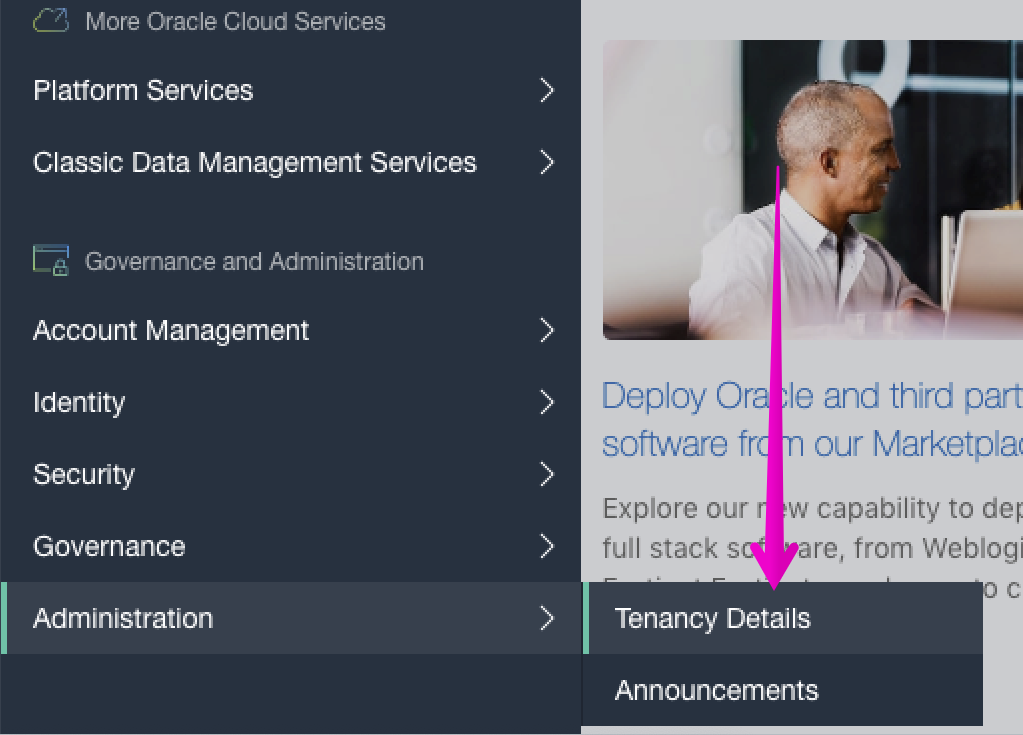
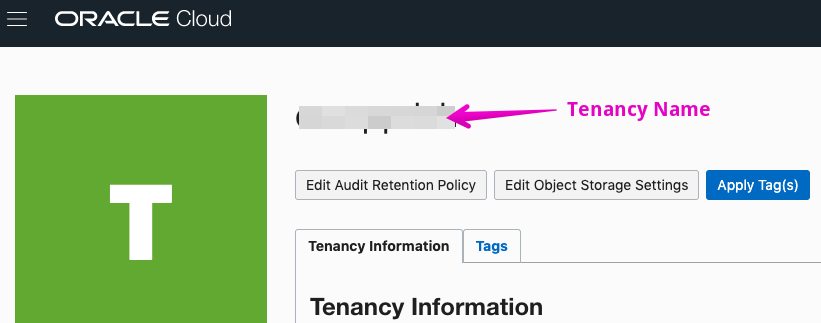
Make sure to use the correct namespace for your tenancy. You can find your namespace on the web console under Tenancy:
Fetching the bucket contents also requires you to add the compartment OCID for your bucket. This is passed via a query string parameter like this:
https://objectstorage.us-ashburn-1.oraclecloud.com/n/aeg/b/?compartmentId=ocid1.compartment.oc1..aaaaaaa...
This should allow you to go through the automatic discovery process. If, for some reason this doesn’t work, you can leave out the query string parameter and add it later via the manual process below.
Web Source Automatic Process
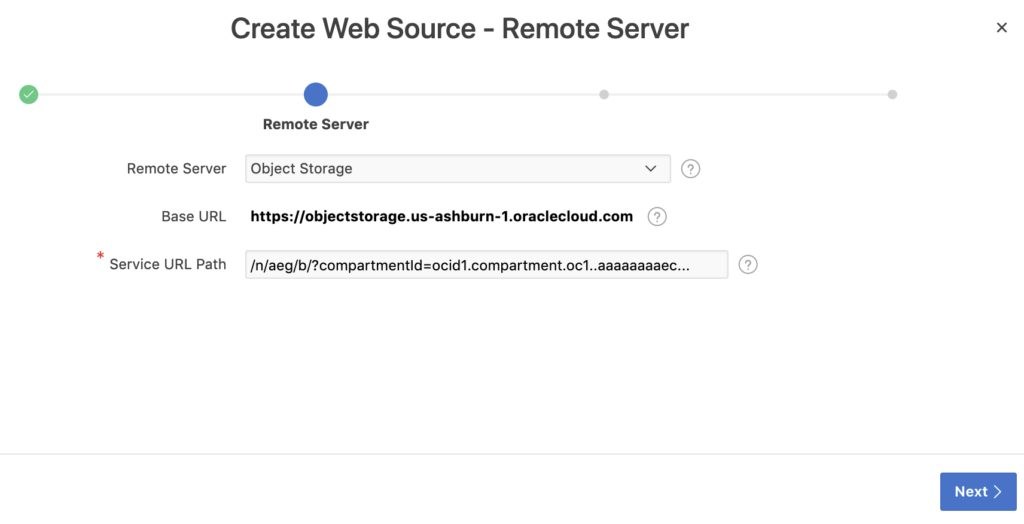
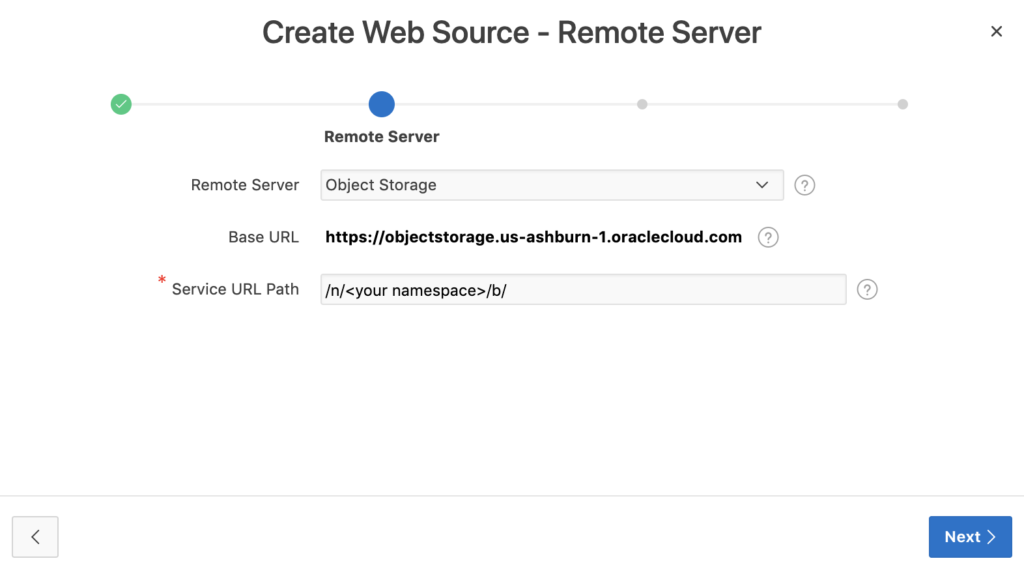
Now click the Next button. The Remote Server should automatically be set to Object Storage (it gets that from the URL), and break up the URL into Base URL and Service URL Path.
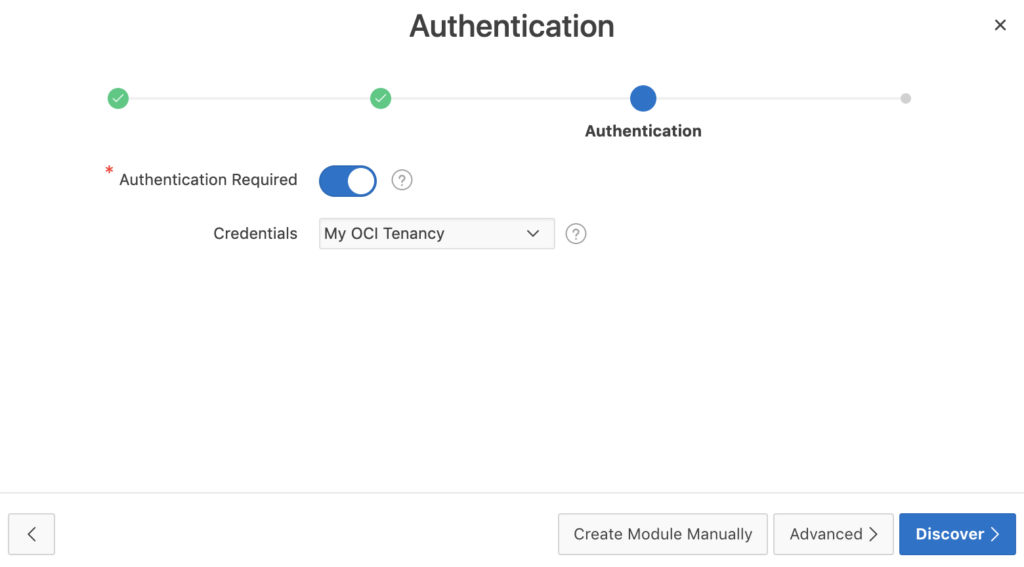
Click Next and flip the Authentication Required button to the right, then select the web credential you created earlier.
Click the Discover button. APEX will now attempt to fetch the bucket data. This may take a few seconds.
The wizard should then come back with the results:
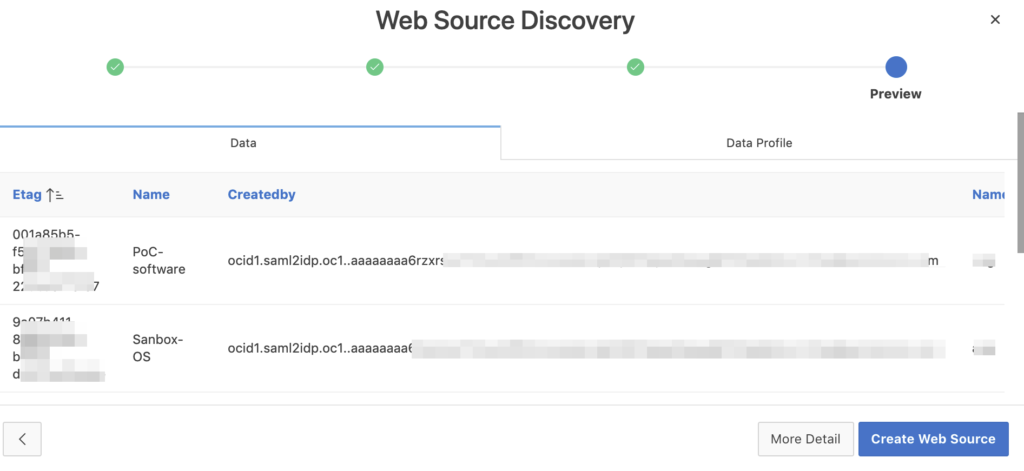
Click the Create Web Source button and you’re done!
Web Source Manual Process
Now click the Next button. The Remote Server should automatically be set to Object Storage (it gets that from the URL), and break up the URL into Base URL and Service URL Path.
Click Next and flip the Authentication Required button to the right, then select the web credential you created earlier.
Now click the Create Module Manually button, because we need to add a parameter. The button will take you back to the Web Modules screen. From there click the web module you just created.
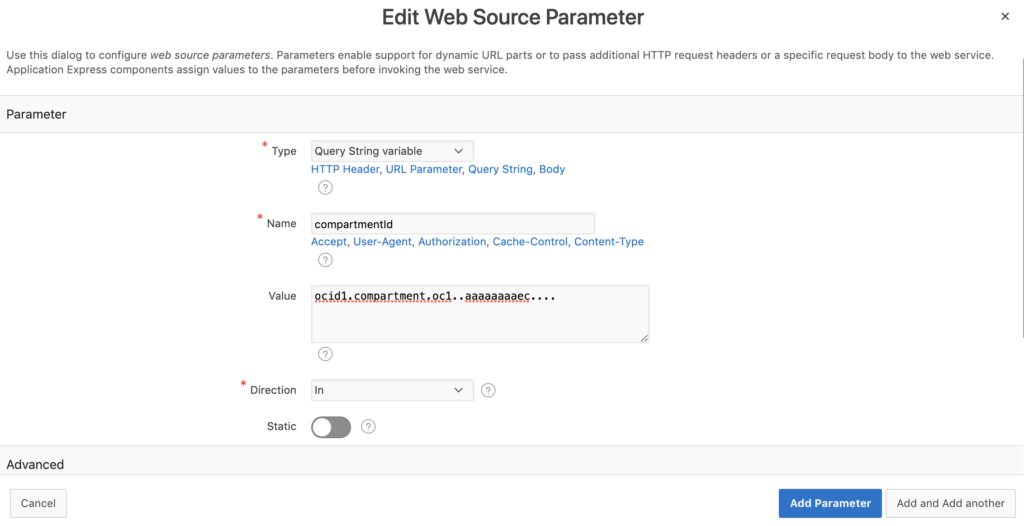
Navigate to the Module Parameters section and click Add Parameter.

Select Type Query String Variable, Name: compartmentId, Value: OCID of the compartment.
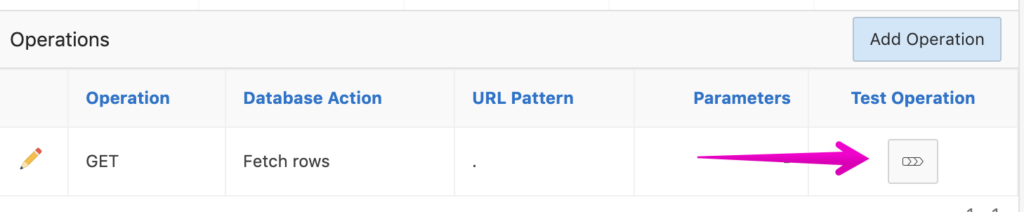
Click Add Parameter and you’ll be sent back to the Web Source Module screen. Now navigate to the Operations section and click the Test Operation button.
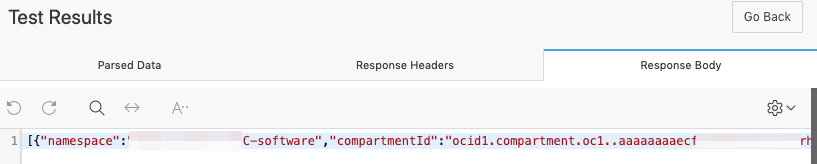
Check the Response Body tab where you should see a JSON string with your buckets:
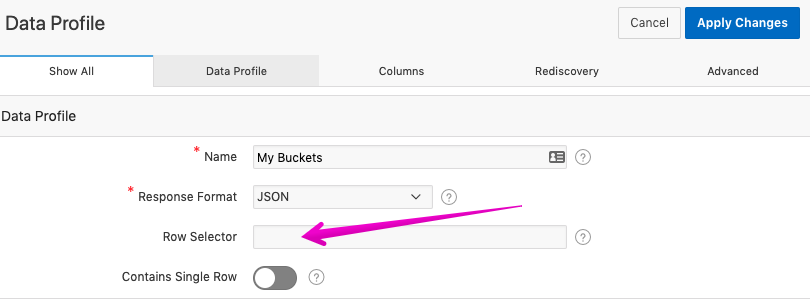
Click Apply Changes, and you should be back on Web Source Modules page. From here go to the Data Profile section and click the Edit Data Profile button.
![]()
Make sure to delete the contents of the Row Selector field. Since the resulting JSON above does not have a name for the object, this field needs to be empty.
Now go to the Rediscovery section and click Rediscover Data Profile.
![]()
You should now see the various columns and their data types:
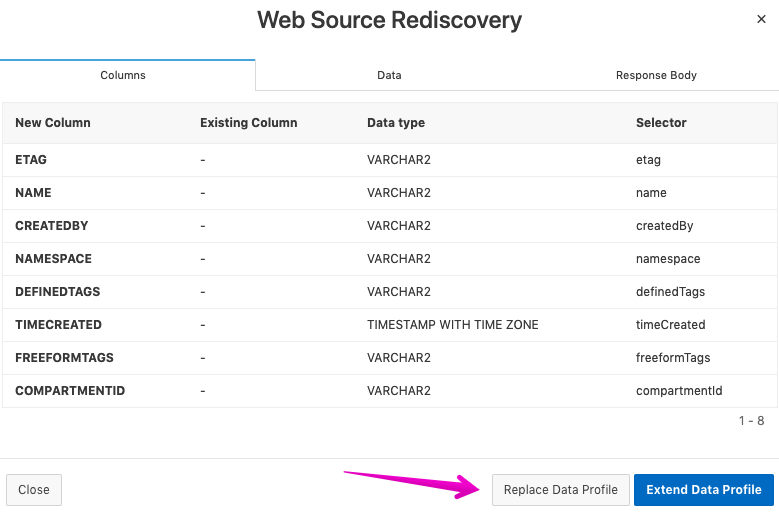
Click the Replace Data Profile button, and on the Data Profile page you should now see the new colums:
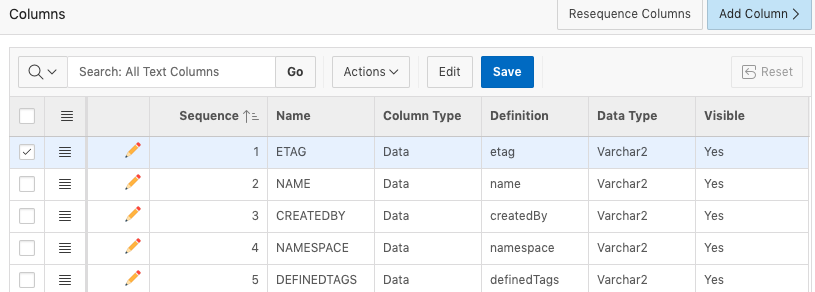
Click Apply Changes, which will take you back to the Web Source Module page.
The web source module is now ready to be used, and can easily create a report to see your bucket list.
I want to give a shout-out to @JoelKallman, @CCzarski, @FuzzieBrain, for providing help with this.